Making Goals

Standard

My life was in a rut. I had been a stay-at-home mom for a few years. I lost my passion for what I used to do for work. I hadn’t figured out a new passion. I felt like I was getting rolled by technology. (Picture me standing in front of a large snowball going downhill gathering size and speed.)

I decided to take the bull by the horns. I made a goal to get myself together. I decided starting a blog would be a brilliant way to help me learn new technology (writing a blog, using a blog reader, improving photography skills, using photo editing software) while narrowing down what my true passions are. I challenged myself to one year/100 posts.

Guess what? It worked. Don’t get me wrong. I went through a dark phase where I felt totally lost. I felt scared, stupid, amateurish, unimportant and bored with it all. But I also learned the following:

* It’s ok to be a pretty good seamstress/knitter and not an expert/indie patternmaker/tutorial writer/book author

* It’s ok to have a wide variety of hobbies

* It’s ok to not do any hobby at all for weeks at a time

* As much as I love my hobbies and all the wonderful friends I’ve made through them, my hobbies are not my life’s passion. I will always enjoy knocking out a sweater, sewing up a quilt, and scrapbooking about my boy’s childhood. But I don’t want to have a job doing my hobbies.

* Writing is for me. When I stopped trying to impress, my blog was fun and helped me sort myself out.

* Just because I don’t have anything big and new to share with the world doesn’t mean I have nothing worthwhile to contribute

* I’m pretty clever to have figured out how to choose a blog host, use blogging software, add sidebars, upload photos, and so on. Yep. Pretty clever.

My big news is, I got a job. It’s part time. I still have a million issues to iron out with my child’s transition to adulthood, so 12 hours a week of work seems perfect. I don’t know if I will still blog, or still blog here about hobbies, or if I will stop by here from time to time and add posts. I am very proud of myself for trying it at all, despite how stupid my mother thinks blogging is.

S’more and S’more and S’more

Standard

I have been busy the last few weeks, with several opportunities to eat S’mores. First I went camping with my family of origin at Starved Rock State Park in Illinois, then I went camping with a friend at Waterloo Recreation Area in Michigan, and today I made S’more cupcakes at the very strong (repeated) request  of my son. Omigosh, how are S’mores so good? I love them so much I actually ate them for breakfast while camping at Waterloo.

The cupcake recipe is from Vegan Cupcakes Take Over the World. Highly recommend the book. I’m not vegan, but I am allergic to cow’s milk, so the book is perfect. So far I’ve made the Tiramisu, Lime Coconut, and now S’more cupcakes. Oh, these cupcakes are heaven. Today I even pulled out my piping bag for the frosting. I almost can’t wait for dessert time. I let my boy have one already as a snack, and then I had to hide the container.

Enjoy!


Bored People Are Boring

Standard

I forgot where I read that, but that little quote has always stuck with me, especially when I am bored. I feel like I’m 9 years old, whining to my mother on summer break: “I’m BORED. There’s nothing to do!” Usually that sort of makes me laugh, and then I force myself to go do something so I’m not a totally lazy, whiny, boring person.

However, what the hell with this summer? It has been miserable hot, with nary a drop of rain since June 2. The weather is giving me serious cabin fever, because I can’t tolerate this heat. I’m a fragile, fair-skinned redhead, prone to heat exhaustion and other-worldly sunburn. Being locked up indoors might seem wonderful, considering I do have central air-conditioning. Yet, the upstairs where the sewing machine lives, it is unbelievable. So hot, so moist, so un-creativity-inspiring. I can do about 15 minutes of sewing before I need to press a seam, and there’s no damn way on earth I’m plugging the iron in after 9 a.m.

There’s been no hiking, no walking the dog, no canoe trips, no camping, no napping in the fold-out lawn chair, no eating outdoors, nor trips to the lake. All the things that make summer great! I live in Michigan, people, not Georgia! Why is it so f’ing hot? Whine, moan, rant, feeling bored and cranky, and everyone else is at work while I’m just sitting here waiting to be entertained or for inspiration to strike, blah blah blah.

THEN: ta-da! It rained. It rained, friends. It rained and rained and rained, and finally stopped just in time to not leak into the basement. Glorious, cooling rain.

You know it’s going to be 100 on Monday again, when I plan to be camping. But today it is perfect. Wet, overcast, and cool out. Got to unplug here and go run that iron.

Empire Waist for Bust Shaping

Standard

Today is another installment in my experiment to find good patterns for a busty gal — and by busty I mean anyone bigger than a B, the size most patterns are based on. Last time I showed some examples of princess seam blouses made with patterns from the Big 4 pattern companies with the adjustable cup option.

While princess seams are great for shaping around a wide variety of busts, they are very figure-hugging, which may not look so great on a fuller stomach. I’m going to reserve princess styles for dresses, where the bodice ends at my narrowest point.

The Empire seam is a clever way to accommodate a full bust, because it allows you to add fullness to the bodice while drawing attention to what is often the narrowest part of the body — or close to it: just under the bust.

In the past I avoided this style like the plague, for two reasons. First, the Empire seam often hit me right in the middle of my bust instead of below it. The second reason was because I had some early failures that left me looking pregnant. (A flattering look when you actually have a baby on the way.) Not actually being pregnant, I found the additional attention on my belly to be undesirable. However, after continuing to read fashion advice that the Empire waist would be right for me, I thought I’d give it another try.

What I realized quickly is that it isn’t the placement of the seam that is problematic, it is the addition of overly full gathers over the abdomen and length of the skirted portion! Not all gathers are bad, so it’s a matter of trying things on. Muslin is a stiff fabric, so you may or may not get an accurate representation of what a final garment will look like, so I highly recommend trying things on in a store and making notes of what works, including fabric choice, gathers versus plain front, whether gathers are placed over a narrow section of the abdomen or the entire width, etc. Length of the top is also very important! Longer blouses can have a maternity look to them.

Let’s look at some various tops with an Empire waist. Some of these are store-bought, some are knitted, and some are sewn. We’re just trying on at this point, to look for clues.
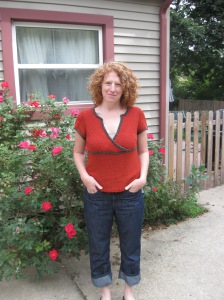
Berroco Asian Tee

This top doesn’t have any gathers at all, and is relatively short. It is made from a cotton yarn that likes to sag out of shape, but I love it. The stretchiness also allows the seam to sit below the bust, as it should. This says, “Not maternity.”

Sew Serendipity

I made a small on top and medium on the skirt section of the Sew Serendipity blouse. The bottom is clearly too big and too long, but the front is plain. If it fit right, I don’t think this would give a pregnant look. The top has gathers at the neckline and above the waist seam, and seems to be long enough to cover the bust.
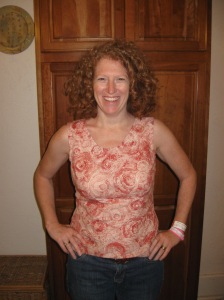
Butterick 3385

I decided to opt out of the surplice top when I made this pattern, because I didn’t have enough fabric. The skirted section is plain and short. This doesn’t say maternity to me at all. I made this before I knew how to do a full bust adjustment (or that I needed one). The seam is just barely in the right spot.
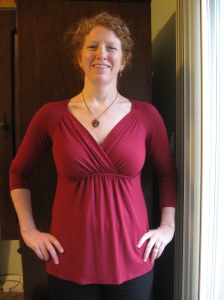
Biu Biu blouse

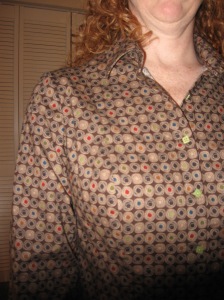
I bought this top from Biu Biu, a company that specializes in tops for women with a larger bust compared to their waist — see my review for more information. This blouse is made of thin cotton jersey and has elastic over the Empire seam. It gathers only directly under the bust and not to the side at all. You can actually see where my jeans start, so this is a fairly long blouse. I admit, this one can give a pregnant look, but it looks worse in this photo than in regular wear. The seam definitely sits where it should.
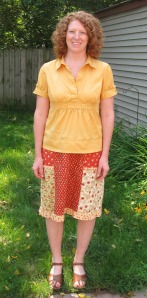
Thrifted blouse (Skirt from Sew Serendipity)

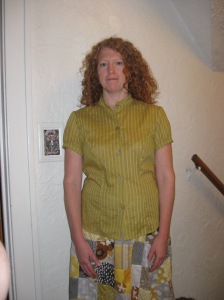
Gathers in this blouse are centered in the front and covered by the button tab. It is made of thin broadcloth. The length is fairly short, and the skirted section is broken up by a very deep, sewn-on hem band. This doesn’t look like maternity at all. The Empire seam is too high and rides up all day.
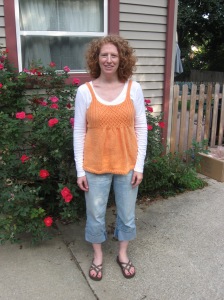
Knitted Moska

Moska was hand-knitted with a cotton yarn that looks and feels bulky. Gathers are centered over the front only, and the blouse is not overly long. I think the bulkiness gives a hint of that pregnant look. Because the top is stretchy and the weight of the yarn drags the entire top down, the Empire seam sits right.
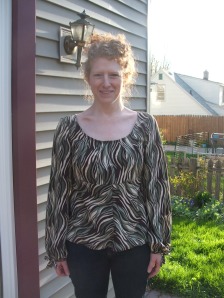
Burda 7798

It might be hard to tell anything because this blouse is all out too large, but there is a vertical seam down the center of the skirt, which definitely says, “Not a maternity top” to me. I made a larger size in the bodice and made the darts deeper than I usually would, but I didn’t add length, and I should have.
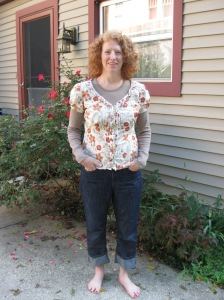
I used Nancy Zieman’s method for a full bust adjustment, but it didn’t add enough length to the bodice. Not only does this blouse (New Look 6869) not have any gathers over the abdomen, it has a button band with vertical ruffles. The top is short and pretty low-cut, so I think the open shot of my bewbs probably distracts from any notion about my uterus.

And that comment brings us full circle, as I started this post to discuss blouses for busts, not necessarily for tummies. My overall impressions are that an Empire waist:

  • must sit below the bust and not on it for best appearance and comfort
  • can be a very good way to get close fitting around the bust with looser fitting in other areas
  • allows for a Full Bust Adjustment to be made that does not also add width to the waist and hips
  • works with a lot of different darting options in the bodice, such as actual darts, under-the-bust gathers, neckline gathers, surplice tops, princess seams, raglan sleeves with ruching, and plain undarted tops.
  • can be very slimming or can add a lot of visual heft, so try things on and note what works for your body!

Princess Seams and Other Fitting Devices

Standard

A few months ago I wrote a post about possible sewing patterns for a bust larger than the standard B cup. I addressed adjustable patterns that include pattern pieces for cups A-D, princess seams from the armscye, princess seams from the shoulder, and empire style blouses. Since then, I have been busily sewing up a variety of patterns, for the sake of science of course. Today I will show some results.

For comparison sake, I offer the following information.

  • High bust: 33.5″
  • Full bust: 37.5″
  • Waist: 30
  • Hip:40
  • I chose to make size 12 with the D cup, adding width at the waist and hipline when necessary

Princess Seams

The classic princess seam from the armscye to the waist  makes a very fitted garment. It can be altered to fit quite precisely and therefore can work well with many bust sizes. For this experiment I used McCall’s pattern 6035, view A.

Princess Seams

Impressions:

  • This style looks great when it ends at the narrowest part of your body, the waist, say for the bodice of a dress. Princess seams make a nice, fitted top. However, for a looser fitting blouse, I’m not in love with this style. To show off the waist well, it must be fitted closely. However, I wanted the blouse looser in the hips, and the two ideas don’t mesh well. I would reserve this style for a dress in the future.
  • With the princess seam ending in the armscye, adjustments to the bust will also change the shape of the armscye.
  • Princess seams are fussy to sew. The larger the cup, the more curved the side piece will be, and the more difficult it is to sew together. Use a less stiff fabric, use a short stitch length, stay stitch and clip the front piece, and possibly run a gathering line on the curvy side piece to help you ease the two pattern pieces together.

  • Regarding the fit otherwise: This blouse is too long on me, and the blouse is still too wide across the upper chest (note drag lines). I might be better off making a 10 with a bigger cup size (which I’d have to draft myself). I placed the buttonhole while wearing a different bra than that in the photo, so I see a lot of gapping that was not there during the making. Clearly the other bra didn’t give me as much support, so the bust point was lower, causing me to place the buttonhole too low. Undergarments do matter!

Shoulder Princess Seams

This style blouse has a seam that runs vertically from the shoulder to the waist, similar to the classic princess seam. It also allows for a close, customized fit. I used Vogue pattern 5678, view C but without the pockets or sleeve tabs.

B5678

Impressions:

  • This style allows for easier adjusting for narrow shoulders. My problem tends to be that blouses are always too wide across the shoulders in front but too narrow around the bust. A seam right into the shoulder offers a great way to address that problem. Again, this blouse shows a lot of wrinkling around the shoulder, indicating that I still need to go smaller, a 10 “E” if they made it.

Too much fabric at the shoulder

  • While easier than the classic princess seam, it is still a little tricky sewing that princess seam accurately without practice. The fabric must be eased in carefully to avoid puckers. The larger the cup size, the more curved the seam, and the harder to sew.
  • Patch pockets right over the curvy seam of the bust seemed like it would a) draw more attention to the bust and b) be very difficult to sew on neatly. How are they going to lie flat over a curve?
  • Again, I didn’t want the bottom half of the blouse to be very fitted, but that conflicts with the nature of princess seams. The bodice can nip in very snug at the waist but then it has to widen out pretty quickly to skim over the belly. Not terrific looking.

Draglines everywhere. Oy.

Since this post is getting very long, I’ll save empire seams for another day. My overall impression is that princess seams of either variety are great for a bodice of a dress, but not so great for a curvy figure with a small waist. Also, the adjustable cup pattern still doesn’t offer a lot of variance from “average” since it only goes up to a D. (The instructions recommend a D cup for 4″ difference between high and full bust.) I may have to revisit my original post about good patterns for a full bust, and make some recommendations!

Time for T-Shirts

Standard

I have been looking for a Step-Up from the t-shirt. At the very least, I want some tee’s that fit properly. I have been a little disappointed by the fabric choices I have seen online and in my local fabric shops. Polyester blend of any amount just makes me hot and the fabric feels sticky or draggy, especially when it is over 80 degrees. Also, I haven’t really loved any of the fabric colors or designs. I might have to look into screen printing. Even Kohl’s sells interesting t-shirts; nevermind that none of them fit me.

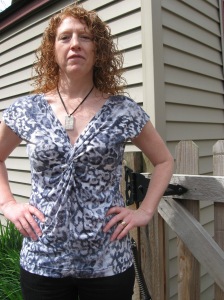
Sewing my own it is then, even if I have to use less than ideal fabrics. I have had two successes and one dud. I very much like the Slinky Snakeskin top. It is so slinky that it slips right off the back of the dresser and hides, which is why I haven’t worn it more. I kept thinking it was in the wash, and then I kept not finding it. I have it back in my grasp now, so it’s back in rotation.

This was made from Butterick 4789, now out of print. Modifications: Lowered the seam under the bust, and sewed the center back seam to contour to my body. Likes: twist front, only 2 pieces, very easy to make, comfy, looks dressy but is really just a t-shirt, seam in the back allows for swayback alteration. Dislikes: Probably needs to be made a size smaller, seam under the bust needs to be lowered more, v-neck in back makes this baby slip forward all day to expose my front.

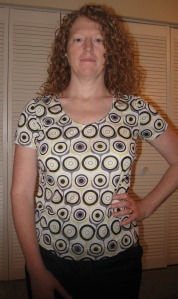
Vogue 8536 is also a winner. She is an actual t-shirt, but fits well due to the bust gathering on the sides. Modifications: Lowered the location of the gathering, made a size 12 in the shoulders and underarm but added an inch to the sides, scooped the neckline, turned the bias strip under instead of making a band at the neck.

Likes: Wow, best fitting t-shirt ever! No drag lines, back looks good. This will be my Tried ‘n’ True pattern for this kind of shirt. I can easily change the neckline and sleeve length. Hoorah! Dislikes: the hem is way too deep. I like the slits at the side, but 2.75″ hem allowance? For what?

While the above two patterns were great, Butterick 5495, not so much. I should have trusted my gut and just stuck with 4789 since I knew it worked, but I got excited about trying something new. I mean, I didn’t want to waste the $1.99 I spent on the pattern, right? Wrong. I ended up wasting $8 worth of fabric on something that won’t ever be right. Lesson learned.

B5495

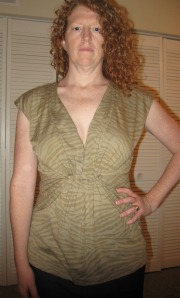
Modifications: Doubled the loop length, lowered the seam under the bust. Likes: Not much. Dislikes: Unbelievably low cut. While the pattern piece says the waist is like 38″ or so, it is not that width when you add the loop. Holy crap, it was like 29″ or less. I ended up doubling the length of the loop, and the front is still tight. So tight it draws fabric from the back making a wrinkly mess. The construction is really fiddly and unnecessarily so, in my opinion.

I might improve the pattern by sewing the under-the-bust seam much longer, thereby leaving less fabric for gathering between the loop. I might widen the fabric at the sides. I doubt very much I’ll do it though, because the other twist top fits so much better and looks pretty much the same.

I have to admit, after making these shirts, I realized that I almost never wear knits in the summer. It’s too hot, they cling and make me hotter, I usually wear skirts and airy woven tops. These will do me until fall, at which point I’ll decide if I want to invest a lot more in making t-shirts.

Cozy Cosima

Standard

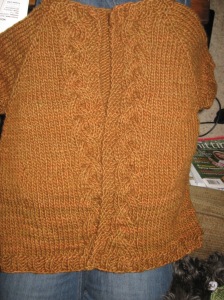
I have had Cuzco Cosima from Berroco booklet #281 in my knitting basket for an age. I actually started the sleeves twice. I am glad I didn’t finish at the time I started it, because I have learned so much in that time, I don’t think I could have made this sweater anywhere near as well as I did. Score one for procrastination!

Truly, when deadlines are arbitrary, I think of it less as procrastination as Knowing Thyself. If it’s a drag, put it away. Hobbies are supposed to be fun. If it’s meant to be, you’ll pull it out again someday and work on it. If not, you’ll decide then what to do with it.

I was very bold with this project. Other than using the recommended yarn (which I never do, but this was on sale), I did little else as instructed. I read a lot of reviews of this sweater on Ravelry that said the sweater was much bigger than represented in the photo. Many recommended going down a pattern size in front. I believed them, after glancing at the schematic. How is a 13″ left front, even with overlap, going to result in a 36″ finished sweater?

I decided to make a small for the back and extra small for the fronts. I also knit this in one piece. I had to do a lot of fancy math to get the pattern to work out well. To be honest, I always find it annoying when a sweater is to be pieced but then does not include extra stitches for a selvedge so you can seam the thing without losing part of the patterning. Duh.

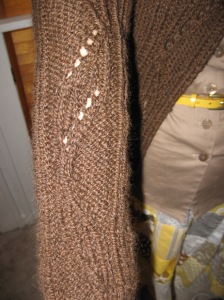
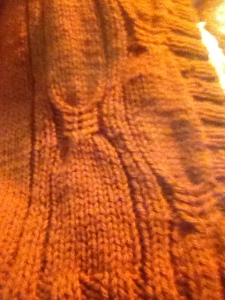
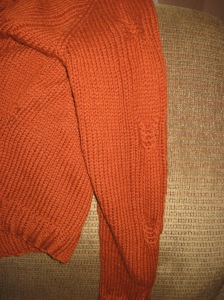
I also made long sleeves, which I thought looked crappy in reverse stockinette. I wanted them in stockinette, but then the rest of the sweater would not match well since it is in reverse stockinette. So I worked the chart over the middle of the sleeve stitches, making mirror image sleeves.

Sleeve detail

It was quite tricksy when I combined the body to the sleeves, remembering which row, facing which direction on which section. Add to it all the decreases, which meant losing part of the pattern each right side row, and this became an exercise in logic and concentration.

I’m happy with the look of the sweater, in terms of not messing up the chart. The yarn seems a little too cushy, if there can be such a thing. It’s thick yarn. I want to block it so the lacework shows well, but I don’t want to make the sweater too big.

I did make some decreases at the side seams, and moved to a smaller needle (twice) in order to shrink this down enough at the upper bodice without messing with the charted stitches.

Afterthought: I wrote the draft of this post on June 10, but it has been unreasonably hot for so long, I just never could make myself put it on for photos!

Sleeves puff out where the shirt underneath ends. Blurg.

Altered Art Necklace

Standard

My friend Patti pinned this similiar smashing necklace on Pinterest and asked me if I could help her with the jewelry part. She is an accomplished (published!) artist in altered art, so I was tickled to help her with the project.

We bought the chain and findings, but everything else either one or the other of us had from back in the day. Isn’t it great? Thanks to Mandipidy for the idea.

I almost “forgot” to take it off after modeling for these photos.

The Wonder of Goal Setting

Standard

I am one of those people that gets a little anxious when I don’t follow through with a commitment. No matter that it was a breezy, passing goal I made on a blog in January. It kept gnawing at me. So, true to my word, I have completed three sweaters. I am now very tickled with myself, both for being a Good Girl and for having added some much-needed warmth to my wardrobe.

For the first round of photos, I was playing with my new iPhone 4S camera, which is supposed to be better than the plain ol’ iPhone 4. Hmpff. You be the judge. I just got the phone two weeks ago when my perfectly serviceable Palm Treo (yes, I know, laugh it up) finally started acting funny. Husband convinced me to get the 4S due to the improved camera (and because he wanted to ask Siri ridiculous things, like, “Where is the nearest bordello?” Turns out there is one in Holland, MI. Who knew?) Anyway, I’m not in love with the camera, but here goes anyway.

Sweater one: Miette. Love, love, love. And blogged here. I will redo this one in another color, maybe changing up the lace. I forgot to note in my previous post that I used Berocco Comfort yarn in “Teaberry”.

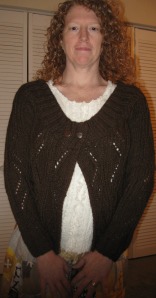
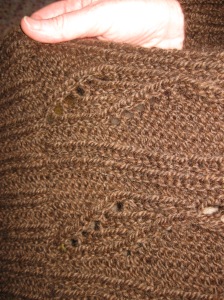
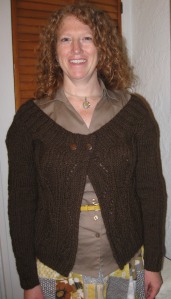
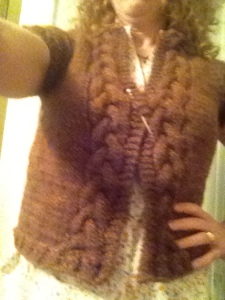
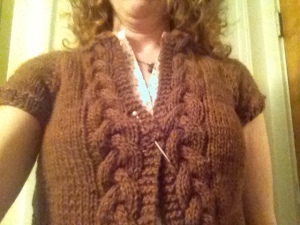
Sweater two: #28 Buttoned Cardi. Oh, so love this one. I made many, many mods, based on my experience with Miette. I used Galway by Plymouth Yarn, in color 156 (sorry, discontinued). I didn’t love this yarn, but it’s ok. I will be wearing it over other things, so softness is not the highest priority.  I read that it felts readily, so I will have to be careful with it.

“Better” iPhone 4S camera. Right.

Ok, maybe not fair to complain about the camera, considering my boy took this photo while looking up from his videogame. But still.

Cable detail. Lovely!

Sleeve detail

Sweater three: Jewels. My, how lovely. Great pattern. I had a yarn emergency with an oddball color. Same dye lot, but it did not match. I had to make do with three little skeins, so it is a bit short. I like it though. I used Sheep Shop Yarn Company (out of business, see review here), in Sheep Number One weight, color A078. I want to love the yarn, but I am annoyed about the color. The last skein really isn’t the right color either, but it is better. Also, it seems like it will felt in a heartbeat. Maybe even with regular wear.

Short rows to the rescue

Bottom third still looks funky. I might have to frog. Grrr.

I had been avoiding knitting sweaters, hence the goal. I had a streak of bad luck in the fitting department. So I knitted a bunch of lace shawls, consulted friends, thought about sewing constructions, and did a little research. Using Ysolda Teague’s fabulous book, Little Red in the City, I learned to design and knit short rows. What a difference.

Catching a Cerulean Warbler

Standard

Today I got up at the crack of dawn to stalk a threatened species of bird, the Cerulean Warbler. The things we do for love, no? My husband is an avid birder who is a volunteer bird bander through the Kalamazoo Nature Center. As such, he was invited to watch (and assist) a research team in their CW banding project.

By the time we left at 10 am, we had caught one Cerulean Warbler that was already banded (caught first last summer), and we coaxed one new bird into the net. Very exciting.

The bird is a stunner, and just as tiny as can be. Look sharp to see him in some of these photos!

I was afraid he would get away, so I held him close at first.


Male Cerulean Warbler, as docile as can be.


Hard to get good sun while standing in a forest


Beautiful, right?